Lateral Ankle Sprains Explained

Exercise & Movement – Tips for Patients with Lymphoedema
January 26, 2020
When Can I Move Again?
February 9, 2020With the weather being the best of the year at the moment we’re seeing more and more people taking to the great outdoors to pursue an active healthy lifestyle. With all the benefits that an active lifestyle brings there are also a few draw backs, one of which is the risk of injury with sudden adoption of new exercises and activity patterns.
An ankle sprain is arguably the most common sporting injury and one we see quite a lot at DISC from elite athletes to weekend warriors. In this article I’ll give you a run down on some ankle anatomy, what is a sprain and what it looks like, what you can do to manage it and most importantly how you can prevent it from happening again.
Ankle Anatomy 101
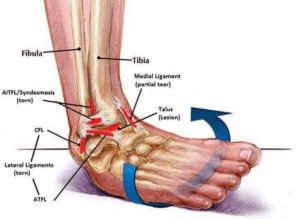
The ankle joint complex is made up of three joints, the talocrural, tibiofibular and subtalar, which allow movement primarily in two different planes. The talocrural joint is a hinge joint which allows forward and backwards motion in what’s called the saggital plane whilst the subtalar joint allows side to side movement in the frontal plane and has a secondary function of shock absorption for the foot when running.
Surrounding these joints are a number of thickenings in the fibrous ankle joint capsule which are called ligaments. You have two primary sets of ligaments which add passive stability to your ankle joint: on the inside or medial portion of your ankle you have the thick deltoid ligament which is one of the thicker ligaments in the body whilst on the outside, or lateral compartment, you have the lateral ligaments called the ATFL (anterior talofibular ligament), CFL (calcaneofibular ligament) and PTFL (posterior talofibular ligament).
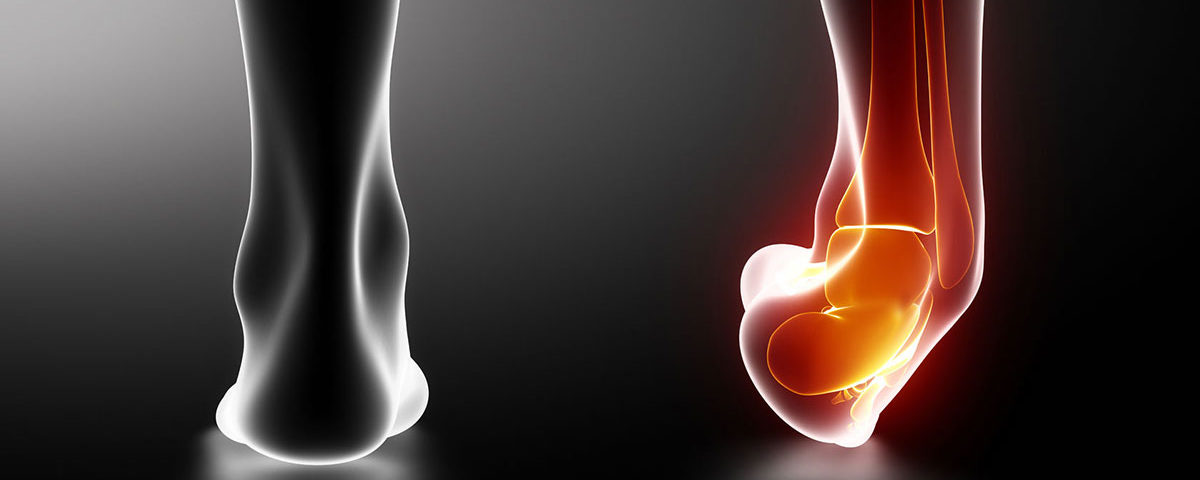
The most commonly injured ankle ligaments are the lateral bands, the ATFL, CFL and PTFL which happens when you roll your ankle usually when stepping down of a heighened surface, changing direction or catching the ground with your toe when kicking a ball.
What does an ankle sprain look/feel like?
Usually at the time of injury you might catch your toe which forces your ankle into a plantar flexed and inverted position which is the ankle’s most unstable position. If the timing/activation of your peroneal muscles group (which resist forced inversion) is delayed and or the force is great enough you will feel a snap or pop in the lower outside of your ankle which could indicate a tear in the collagen matrix that makes up the ankle ligament.
Oftentimes it will be difficult to weight bear on the affected ankle immediately after the event and a dull nauseating ache is common to follow which is indicative of inflammation in the area which kickstarts the healing process.
Immediately after a tear in the ligament the local small blood vessels surrounding the tear site will dilate allowing a higher volume of blood to flow to the injured area bringing the nessacery proteins, collagen and fibrin to build new robust scar tissue. It also ensures adequate oxygen is available to fuel the healing process and also removes any of the old tissue debris that may be dead or damaged. The platelets in the blood form a clot on the tear site which hardens to form firm scar tissue which matures over months allowing your ankle to function as it did before.
How do I know how bad the tear is likely to be?
The immediate degree of disability is a good indicator of how severe the tear is. To help identify the severity of the ankle sprain healthcare practitioners use a 3 point grading system:
Grade 1 – Onset of pain will be slightly delayed and you’ll likely be able to walk with a relative degree discomfort, swelling over the lateral ankle joint and minimal bruising may be present in th coming days.
Grade 2 – Onset of pain will be immediate and walking will very difficult. There will be a considerably amount of swelling resembling a golfball on the outside of the ankle and bruising towards the bottom of the foot which will usually appear a few days after the injury.
Grade 3 – Again onset of pain is immediate and is severe. A grade 3 ankle sprain is usually associated with a fracture dislocation of the ankle joint as commonly all three lateral ankle ligaments will failure due to the amount of force transmitted through the ankle. Severe immediate pain, instability, inability to weight bear and immediate swelling are hallmarks.
Managing an ankle sprain?
Firstly have a qualified healthcare practitioner evaluate your ankle to determine if you require X-ray or MRI imaging, onward referral to orthopedics or just to get straight to rehabilitation. The practitioner will ask you questions of where the pain is located, what makes the pain worse, what makes it better, how the injury happened, the cycle of your symptom throughout the day/night and if there are any pins/needles or numbness present.
In the early stages of an ankle injury you want to adhere closely to the POLICE and HARM strategies which include Protecting the area, Optimally Loading the injured ankle (if you can walk without pain then continue walking, if you can’t then use crutches etc.) Ice to reduce excessive inflammation and swelling, Compression with tubigrip bandaging to again reduce excessive swelling and Elevation to help drain swelling away from the injured area.
HARM is things to avoid after an ankle injury: Heat (causes vasodilation and more bleeding into the area), Alcohol (things the blood and again causes more bleeding), Exercise on the affected limb and Massage (not for the first 72hrs).
Once there is no fracture identified or associated with your injury rehabilitation can begin. This usually starts with massage for swelling drainage, active range of motion (AROM) exercises and possibly some anti-edema RockTape to further help reduce swelling and alos to add a small degree of support to the ankle joint.
Once the swelling and pain has dropped down AROM in all directions and isometric muscle contractions can start (contracting the muscles that move the ankle without the ankle actually moving). Stretching to restore normal ankle ROM can also be introduced once the ankle is non painful and non swollen.
Once the ankle joint moves freely through it’s full range of motion unimpeded by pain we perform isolated strengthening activities whilst evaluating the surrounding joints (knee, hip and core) to ensure normal movement or mechanics and mechanics are present here as abnormal movement or restriction here can cause a reinjury of the ankle joint.
Once all the individual parts a well oiled and well we step back and have a look at global generalised movement in the form of the FMS (Functional Movement Screen) screen to ensure overall you move well and without any pain. When moving well then we start the heavier compound lifting which taxes the whole body and integrates the ankle back into global movement which is needed for sport. Gradually increase the resistance using bands, bodyweight and barbells to strengthen the muscles until the baseline strength needed for your sport is reached.
End stage rehab includes ballistic training in hopping, jumping and bounding progression to regain full explosive ankle control and once this is normal with no pain we gradually reintroduce back to your chosen sport.
I hope this was useful information for you on how we would go about treating an ankle injury here at DISC and if you are suffering from an ankle injury please don’t delay in contact us to have it evaluated, treated and get you back to your best!
Redmond C.


